“One of the distinct advantages of a binocular telescope is that it can effectively operate at lower magnifications for the same aperture because you can get more light into your eyes without increasing the exit pupil.” - Dave Trott
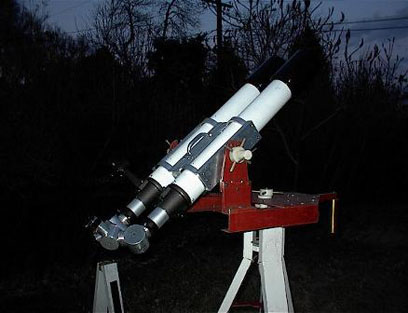
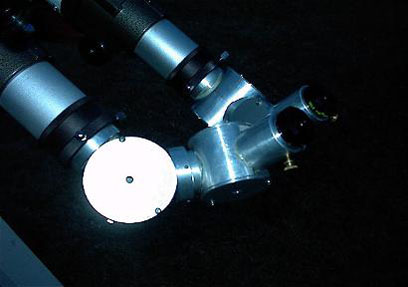
A few years ago a friend bought some 15×80 binoculars. Wow, were they beautiful! The views of the Milky Way in Sagittarius were breathtaking! But these binoculars were expensive. Since I could not afford a pair of nice giant binoculars like his I scrounged up some parts and began to work. My first experiment with large binoculars involved a pair of identical 60mm Pentax refractor tube assemblies attached to a 10×50 binocular assembly with the original objectives removed. I simply attached the refractor assemblies to the binocular body as you can see in the picture. The result is a 30×60 giant binocular.
My first set of big binoculars
This is the perfect instrument for viewing the moon at low power. Notice the metal coupling hardware near the end of the tubes. This is the means for adjusting the co-colimation of the instrument. It was a lot of work to get these binoculars to maintain co-collimation when they were adjusted for the interpupillary separation. This is, I think, the most significant difficulty with all large binoculars. This instrument requires that the user look straight through the instrument, which can make astronomy difficult because the targets sometimes ride very high in the sky.
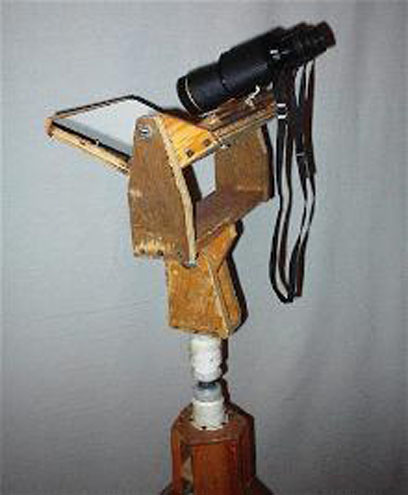
A simple solution
Here is one solution to that problem. Attach the binoculars to a stand which has a reasonably good first surface mirror placed at a 45 degree angle in front of the binoculars. The resulting image is mirror reversed, of course. But that makes little difference for most astronomical observing. And the increased comfort is well worth the modification. In many cases these stands have been set flat on a table. I designed mine to tilt and swivel to reach any target. I can even adjust the angle to be more or less than 45 degrees. I use this with ordinary 10×50 binoculars.
Lazy Diagonals
Many years ago I read an article in Sky and Telescope written by Tatsuro Matsumoto describing a nifty trick he devised which used two mirrors to provide an upright and left-to-right correct image using standard 1.25″ eyepieces. This system has only two reflections per eye and a “correct” image (as with an Amici prism) in binoculars. This article appeared in “Sky and Telescope” magazine in November,1982. Working from his idea I devised and constructed a set of four “lazy diagonals” which, when coupled together two at a time, deliver a 90-degree viewing angle and involve only two reflections, much like an Amici diagonal. I experimented with this system and suffered many crossed eyes before I abandoned the concept for home-made large binocular telescopes. My construction techniques were just not up to the exacting optical requirements of long focal length instruments. However tatsuro Matsumoto is now producing a commercial version of these. You can learn more at Tatsuro Matsumoto’s Page. A skilled amateur telescope maker has used the product in a couple of scopes. See Joe Castoro’s page. Visit Giant Binoculars as well.
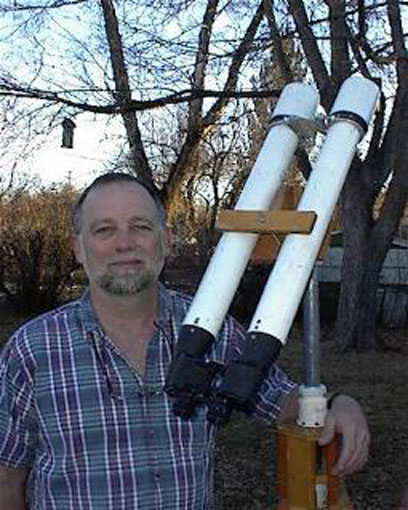
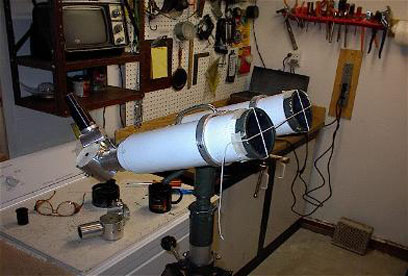
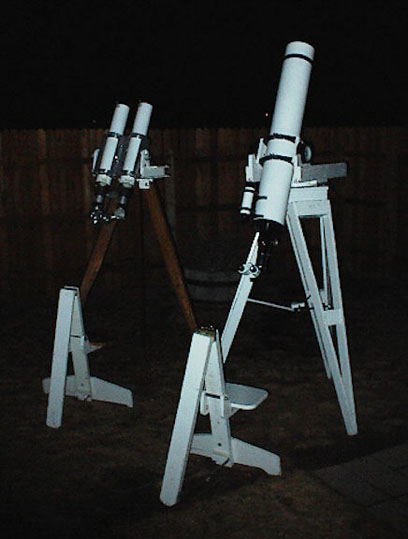
This is my attempt to integrate the system with a pair of 4-inch f/10 refractors:
4-inch binoculars
The derivation of the proper angles for the “lazy diagonals” required a bit of trigonometry. Collimation was a nightmare. And the interpupillary distance is not easily adjustable, though I discovered that I could rotate the lazy diagonals a bit (introducing a minuscule amount of field rotation ) to tweak the interpupillary distance a mite. This also turns the eyepieces a bit, so that their axial alignments are not perfect. The longer-than-usual focal ratio (f/10) may make the system a bit more forgiving of such abuse of the optical train. It may also be that the Plossl design is more lenient.
The views through this binocular were breathtaking, when it worked. The image was correct (not a mirror image), right-side-up and quite bright. The idea was to make something portable with a middle to higher range of magnifications and aperture for binoculars that would be very robust and hold it’s colimation well. The last point was the downfall of these binoculars. It simply required a major readjustment every time I touched the instrument. It was an agony of twiddling set screws and getting crossed eyes every time! It seems to be IMPOSSIBLE to overbuild such instruments!
The weird “lazy diagonals” gave the instrument an interesting appearance:
Lazy diagonals
Lazy Diagonals - Construction Details
The diagonals are called “lazy” because they don’t make it all the way to 90 degrees and they seem to be just a bit “lazy”.

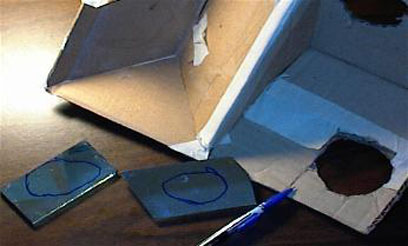
Open panel on the diagonals
You can get a good idea about how they work by study of an “amici” diagonal which involves a roof prism. In essence, this is two reflecting surfaces at a perfect 90 degree angle with respect to each other. If you look into this assembly from an angle such that you are seeing an image reflected by both surfaces, the image will be a correct (non-mirror) image that is not inverted. (With prisms, you are limited in these angles by certain characteristics of the glass).
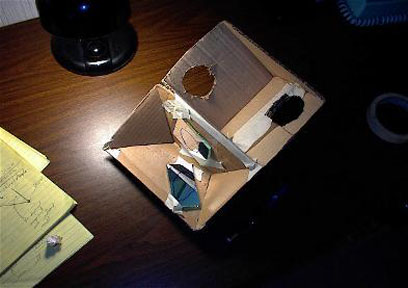
I convinced myself of these facts and experimented with angles by building a small cardboard 90-degree corner (see photos below), placing mirrors on the opposite surfaces and looking “into” it from many angles. I was able to look through any angle from much less than 90 degrees to nearly 180 degrees. The fact that my assembly was made of mirrors rather than solid glass, as in a prism, meant that I could really look at about any angle; I was not limited to 90-degrees. A study of the geometry of the situation and the construction of a working model will convince you that the only important thing about these “lazy diagonals” is that they all be the same in your system. You can select any (reasonable) angle for any desired resultant viewing angle.

The angles involved
I wanted a nearly 90-degree diagonal but since I was not limited in my choices I finally settled on an angle of about 80 degrees as an optimum viewing angle. The geometry is outlined in the diagram. The required reflection angle for each individual mirror is about 125 degrees and the “chiral” (rotational) angle is about 77 degrees. I built this as two adjustable “lazy” diagonals, each one at an angle of about 125 degrees with an adjustable “twist” between them. I got the approximately 80 degree bend with only two reflections. The image was correct and right-side-up. Each mirror was mounted on small adjustable mirror mounts to permit fine adjustment.
The process of making the adjustments to each small mirror was time consuming. I assembled all the components, attached them to the tube assemblies without the objectives in place and tweaked each one iteratively until I had everything collimated (I was looking straight down the CENTER of each tube) and each view was a perfectly orthogonal. I used a window screen to make sure all the horizontal and vertical lines were the same in each eyepiece. In operation, I do not make any regular adjustments to these small mirrors. This was a one-time process.
The entire optical assembly MUST be as robust as possible to keep the optical components perfectly rigid. When each telescope is adjusted for parallism using the small set screws in the mounting rings, they must maintain that perfectly. This was the downfall of the instrument. Remember this point if you build any large binoculars: the longer the focal length the more sensitive the instrument will be. Very slight adjustments can be made by fiddling with the eyepieces, but this as at the cost of introducing possible optical defects to the image.
Here’s an image of my jig for setting parallelism and centering with the lazy diagonals. This is a matter of an hour or two and much trial and error.
Alignment
If you decide to build such a project, please let me know how it works out. Best of luck!!
Comparison Test
On several occasions I did careful comparison testing of this instrument. I compared it with a 6-inch f/10 refractor using a binoviewer. The effective light gathering area of the 4-inch was about 25 square inches and that of the 6-inch was about 28 square inches. The 4-inch had 10mm Televue plossl eyepieces yielding 100X and the 6-inch had 17mm Televue plossl eyepieces for 88X. I made the comparisons in my backyard under urban skies and viewed the Moon, Jupiter, Saturn and M42 (the Trapezium stars and modest amounts of nebulosity were visible). By the way, this testing complements my research with 13-inch binoculars under a dark sky. See Giant Binocular Telescopes for details.

The results were consistent with my experiments using larger binocular telescopes. I found that the views through the binoculars were superior, but not not by very much. The brightness, at least for these experiments, was about the same. The detail was also similar. And the aesthetic experience was delicious in both cases as long as everything was working properly.
As for the binoviewer option; my homemade giant binoculars were always in need of tweaking while binoviewers were very simple, effective and relatively hassle-free. One of the distinct advantages of a binocular telescope is that it can effectively operate at lower magnifications for the same aperture because you can get more light into your eyes without increasing the exit pupil. But, if a binocular telescope carries a hefty price tag then that slight advantage quickly evaporates. Rather than buying or building a giant binocular telescope, it might be smarter to invest in a binoviewer and a larger aperture instrument to go with it. The most substantial payback of binocular viewing, seeing things with both eyes, is available to you with much less hassle and probably at a lower cost if you buy a good binoviewer.
Assuming you have decided that you MUST have a giant binocular telescope: the key point to be made for anyone considering whether to build or buy giant binoculars is the substantial difficulty of setup and constant need for adjustment of amateur made instruments (at least for amateurs with my level of technique). I have had the opportunity to check out some 5″ binoculars from Orion. I find that they meet the exacting requirements for mechanical and optical precision in giant binocular telescopes beautifully! They were a pleasure to use and had wonderful views. In my opinion they are well worth the price. I am sure that many other makes are good too. I’ll bet the Fujinons are breathtaking!
Binoculars have a valuable role in astronomy…the traditional role. The lower power of binoculars is a distinct advantage in any effective aperture. A pair of fine quality giant binoculars is an exquisite luxury. They excel at quick, fun trips through the sky. If you buy Phil Harrington’s book Touring The Universe Through Binoculars you will have a great time with a pair of binoculars whether they are 50 mm or six inches. Anyone considering the binocular telescope option must realize that you should stick with large aperture monoscopes to really haul in the photons and deliver the resolution. You can taste the best of both worlds with a good binoviewer, if you can afford one. And if you simply must have the biggest binoculars possible, be prepared to pay dearly for them.
Other Designs
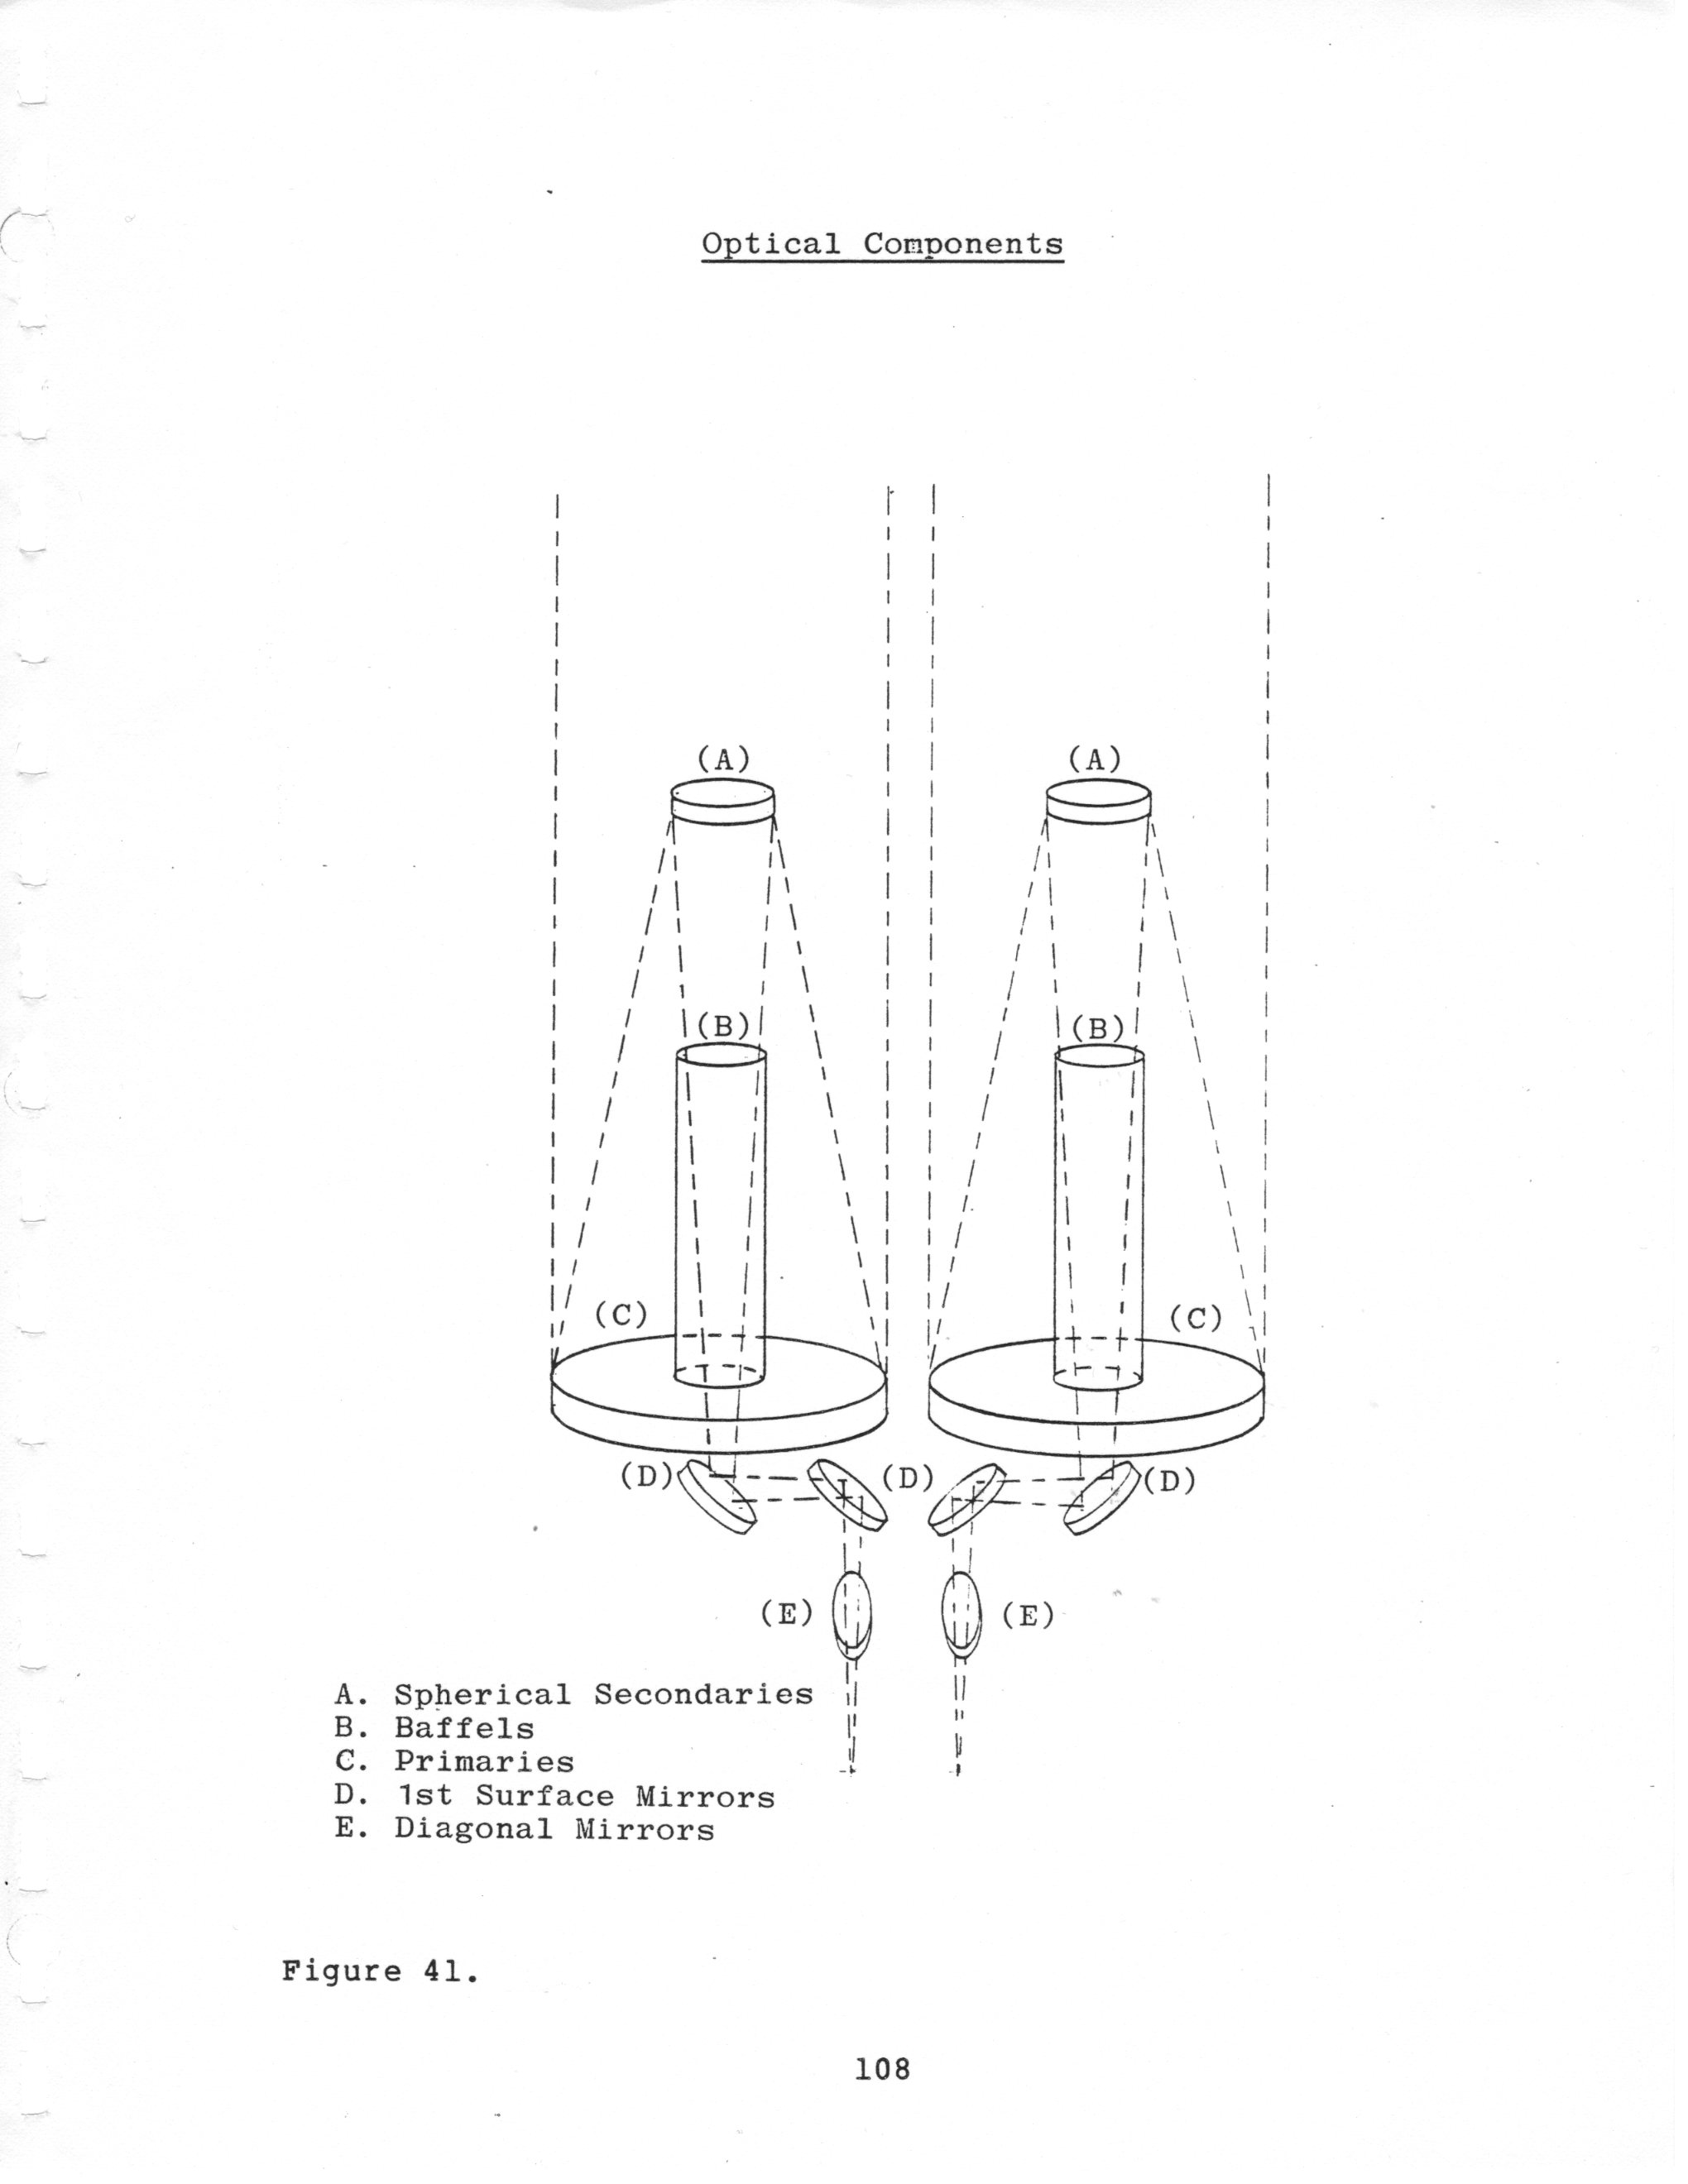
Back in 1981, Norman Butler built these unique dual Cassegrain Binoculars. Check this link to RTMC or See Sky & Telescope Nov. 1982 for details. Thanks to Norm for permission to use this image.

Cassegrain Binoculars